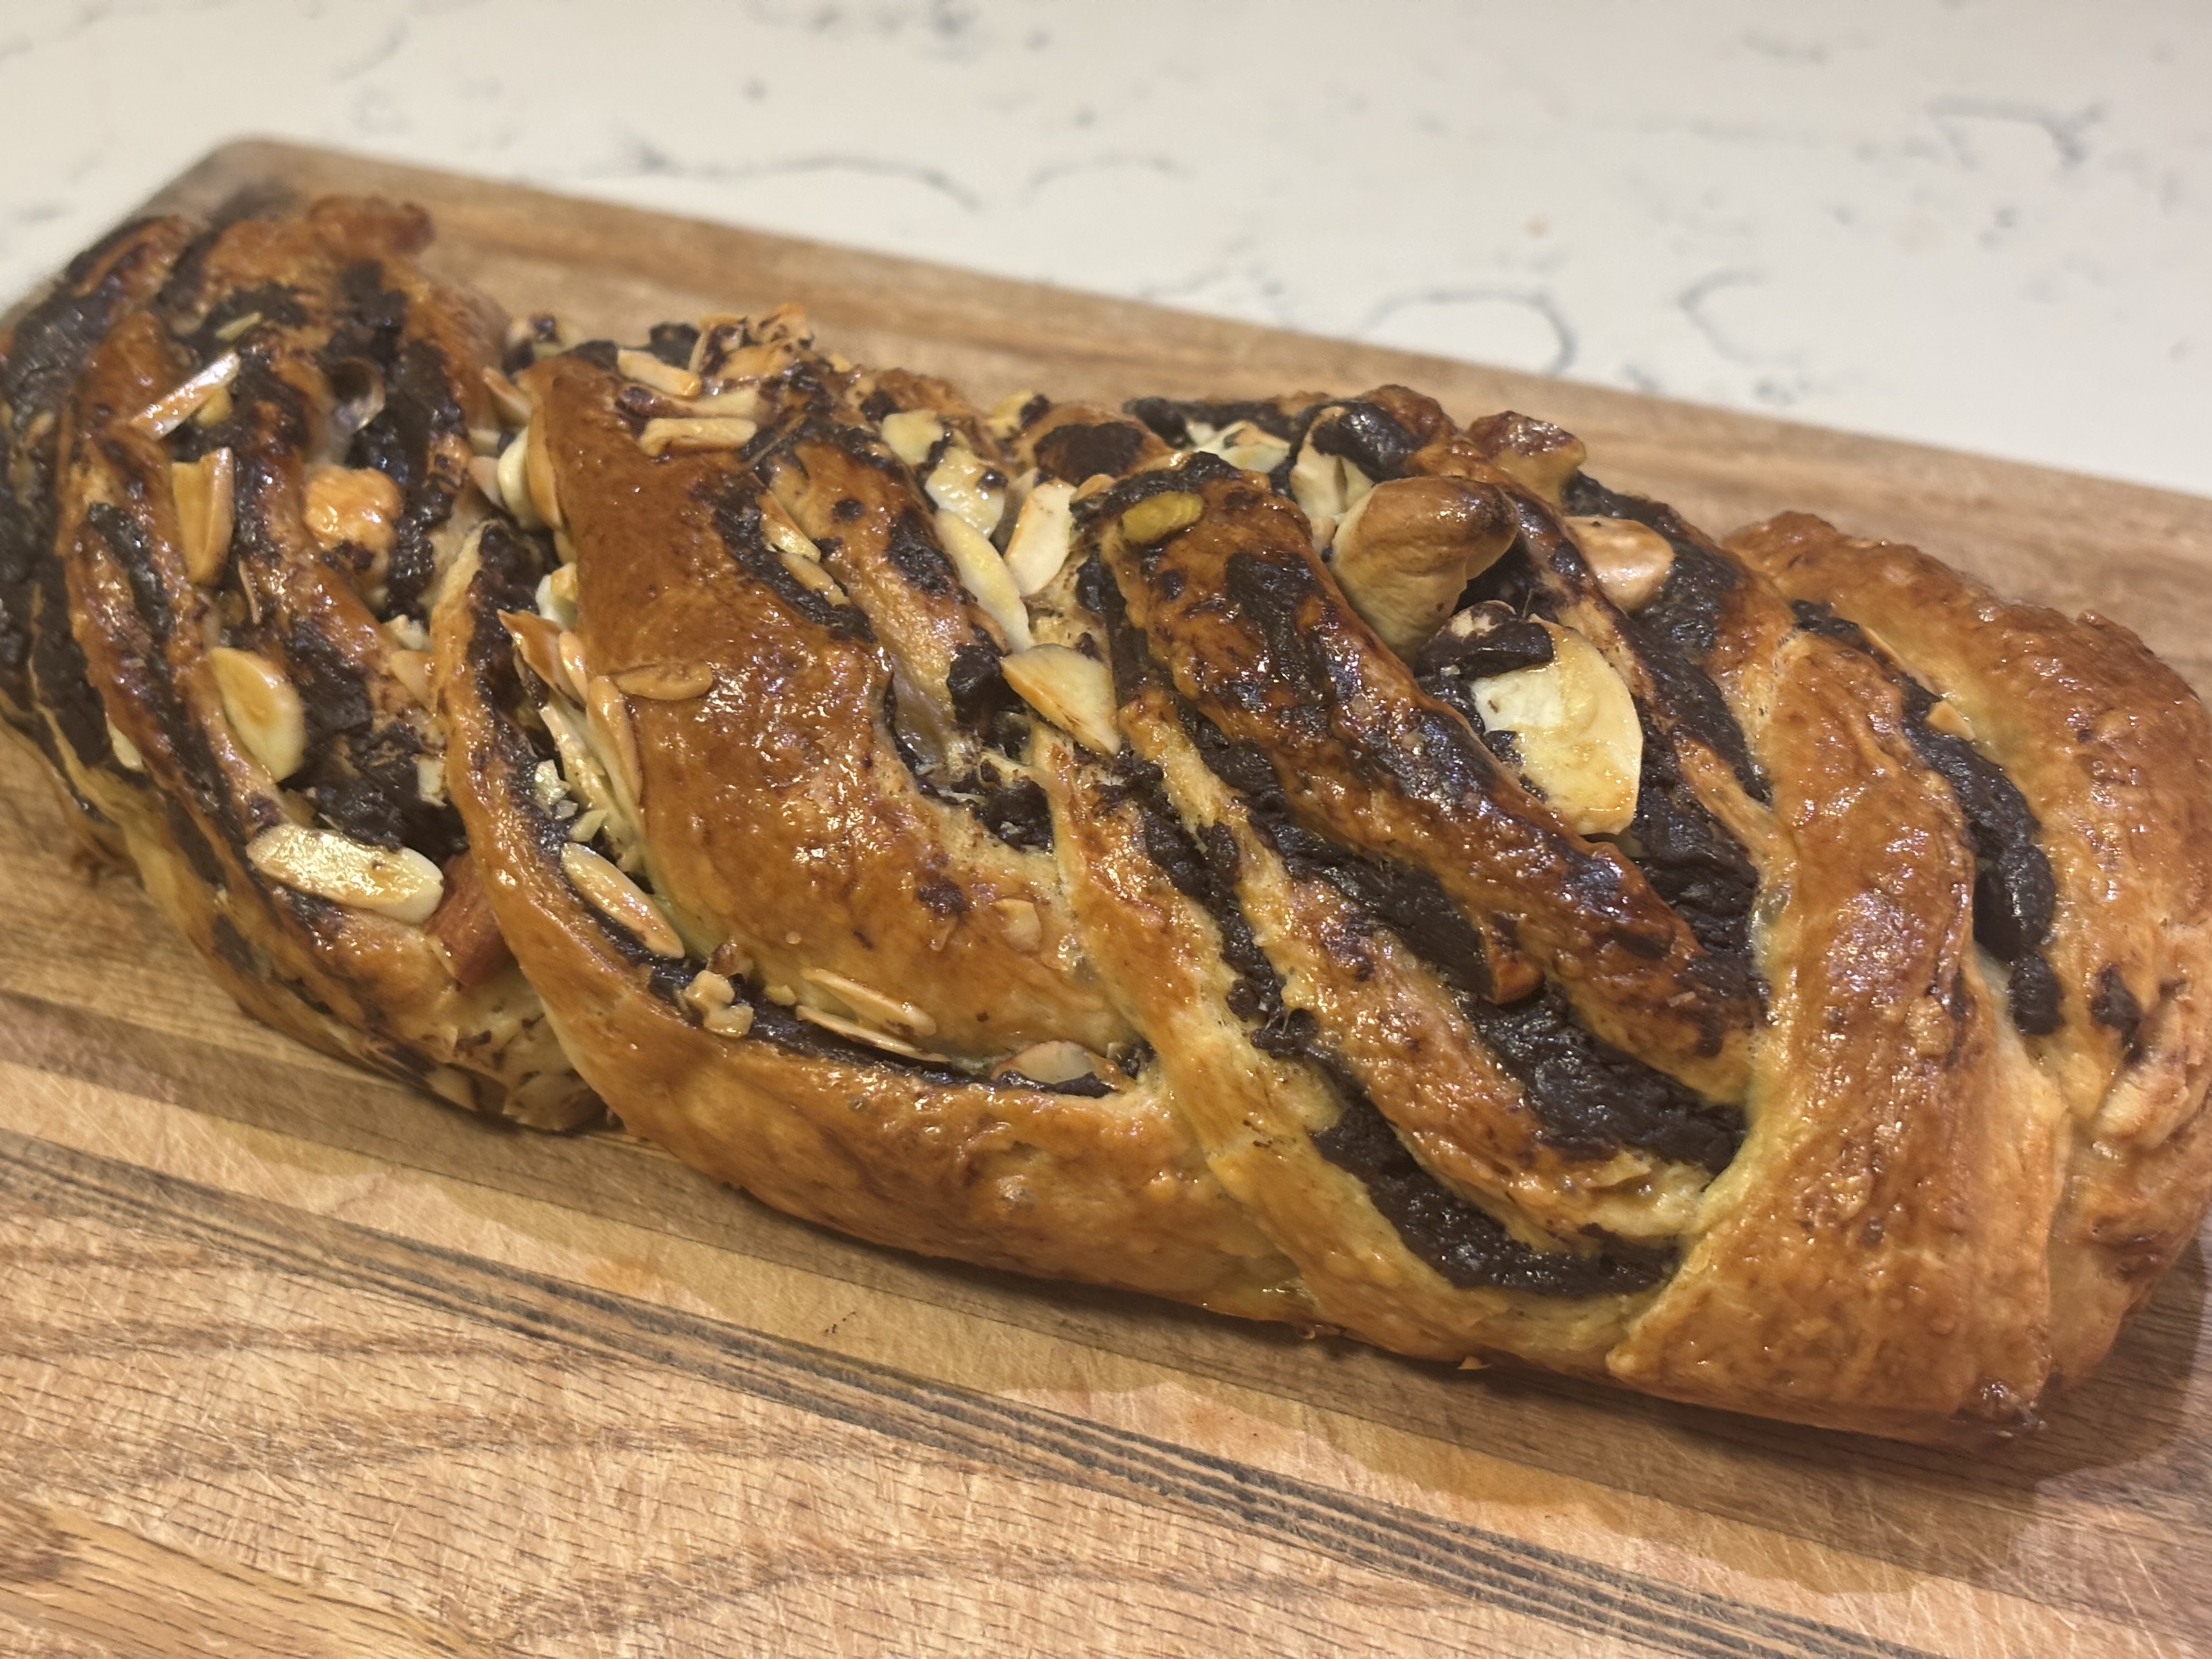
If you are looking to bring the comforting aroma of a French bakery right into your home, this chocolate and nut twisted brioche is the perfect weekend baking ritual. Brioche is beloved for its rich, buttery flavor, crisp on the outside yet beautifully fluffy and tender on the inside. This lightly sweetened dough is filled with smooth chocolate and crunchy, fragrant roasted almonds, making it a spectacular treat for a slow morning breakfast or a cozy afternoon teatime. By using a standard loaf pan, shaping this intricate-looking twist becomes wonderfully approachable, allowing you to create something truly beautiful to share with the people you care about.
Jump to Recipe
Chocolate & Nut Twisted Brioche Loaf
Course: Breakfast / Snack / Afternoon TreatCuisine: FrenchDifficulty: IntermediateServings
4-6
servingsPrep time
50
minutesCooking time
18
minutesCalories
246
kcalFermentation/Rising Time
150
minutesIngredients
- For the Brioche Dough:
Bread flour: 150g
Cane sugar (Kibi sugar): 18g (Provides a mild, natural sweetness)
Fine sea salt (such as Guérande): 3g
Instant dry yeast: 3g
Whole egg (beaten): 60g
Milk (warmed to body temperature/ For this I used almond milk): 30g
Unsalted butter (refrigerated): 60g
- For the Chocolate & Nut Filling:
Couverture chocolate flakes (sweet): 35g
Granulated sugar: 20g
Unsalted butter (refrigerated): 5g
Bread flour: 10g
Pure cocoa powder: 10g
Milk: 40g
Roasted almonds (coarsely chopped): 30g
- For the Topping:
Egg wash: As needed (for brushing the top)
Powdered sugar: As needed (for dusting)
Directions
- Prep Work
- Measure out all ingredients for the dough.
- Lightly spray a 17cm loaf pan with oil and line it with parchment paper.
- Coarsely chop the roasted almonds and set aside.
- Prepare to preheat your oven to 220°C (425°F) dynamically so it’s ready when the final rise finishes.
- Kneading the Dough
- Stir the instant dry yeast into the warm milk and let it sit for 1 minute (it is perfectly fine if it remains slightly clumpy). In a large mixing bowl, thoroughly whisk together the bread flour, cane sugar, and salt by hand. Add the beaten egg and the yeast mixture, then stir until a dough forms. Transfer to a clean work surface and knead well until the dough smooths out and can be stretched into a thin, translucent membrane.
- Incorporating the Butter & First Rise
- Add the 60g of unsalted butter into the dough and continue kneading. At first, it will feel slippery and messy, but keep working it until the butter is completely incorporated and the dough becomes silky, smooth, and passes the windowpane test again. Shape the dough into a smooth ball, place it back into the bowl, cover with plastic wrap, and let it rise at 30°C (86°F) for about 1 hour.
- Punch Down & Secondary Rise
- Once the dough has grown slightly larger, gently punch it down to deflate the accumulated air. Take the dough out, fold it inward from the top, bottom, left, and right, and reshape it into a tidy ball. Place it back into the covered bowl and allow it to rise a second time at 27°C (80°F) for about 90 minutes, or until it has fully doubled in size.
- Making the Fudge Filling
- While the dough is undergoing its second rise, prepare the filling. Sift the bread flour and cocoa powder together. In a small saucepan, combine the cocoa powder, bread flour, and granulated sugar. Gradually pour in the milk while whisking to prevent lumps. Place over low heat, add the chocolate flakes and 5g of butter, and stir continuously until the chocolate is melted and the mixture thickens into a smooth, spreadable paste. Remove from heat and let it cool.
- Shaping the Twist
- Turn the risen dough onto your work surface and gently press it down with your hands to release the air bubbles. (Tip: If the dough feels sticky, lightly dust your surface and hands with bread flour). Roll the dough out into a 20×22cm rectangle. Spread the cooled chocolate filling evenly across the entire surface, then scatter the chopped roasted almonds on top. Roll the dough up tightly starting from the long edge closest to you, and pinch the seam firmly to seal the log.
- Creating the Braid
- Using a sharp knife, slice the log completely in half lengthwise to expose the beautiful inside layers of chocolate. Turn the cut sides upward, lay the two strands across each other to form an “X”, and gently twist/braid them together. Carefully lift the twisted dough and place it into your prepared loaf pan.
- Final Rise & Baking
- Cover the pan and let the dough rise at 30°C (86°F) for about 60 minutes, or until the highest point of the dough rises roughly 1cm above the rim of the pan. Gently brush the top with egg wash. Bake in your preheated oven at 220°C (425°F) for about 18 minutes until it achieves a deep, golden-brown crust. Transfer the loaf to a wire rack to cool. Once the loaf has cooled slightly, dust beautifully with powdered sugar before serving.
Notes
- Handling Sticky Dough: Brioche contains a high amount of egg and butter, which can make the dough feel quite sticky during the shaping process. Don’t worry if it clings to your hands! Keep a small bowl of extra bread flour nearby to lightly dust your work surface and rolling pin as you roll and cut the dough.
Managing the Oven Temperature: Baking at 220°C (425°F) gives the brioche its iconic, crispy external crust. However, because of the sugar and chocolate content, the top can brown very quickly. Keep an eye on your loaf around the 10-minute mark; if it is already quite dark, loosely tent a sheet of aluminum foil over the top of the pan for the remaining bake time to prevent burning.
Storing and Refreshing: Brioche is absolute heaven when eaten fresh on the day it’s baked. If you have leftovers, keep them wrapped airtight at room temperature for up to 2 days. To bring back that “freshly baked” texture, pop a slice into a toaster oven for 2 to 3 minutes until the chocolate filling gets slightly warm and melty!

Leave a Reply